

Introduction
Creating your own natural and herbal soap at home is a fulfilling and eco-friendly way to care for your skin and the environment. Whether you’re looking to reduce chemical exposure, explore a new hobby, or even start a small business, soap-making offers endless possibilities. This guide will walk you through the process step-by-step, helping you craft beautiful, nourishing soaps that are as good for your body as they are for the planet.
Why Make Your Own Natural and Herbal Soap?
Making soap at home allows you to control every ingredient that goes into your soap, ensuring it’s free from harmful chemicals and additives. Here are some benefits of homemade natural and herbal soap:
- Customizable Ingredients: Choose your favourite herbs, essential oils, and natural colourants to create a soap that suits your skin type and preferences.
- Eco-Friendly: Homemade soap can be made with sustainably sourced ingredients, reducing your environmental footprint.
- Health Benefits: Natural soaps are often gentler on the skin and can be tailored to address specific skin conditions or needs.
- Potential for Profit: Handmade soaps are highly sought after in the market, making them a great product for a home-based business.
Essential Ingredients and Tools for Soap Making
Before you begin, gather the necessary ingredients and tools:
- Ingredients:
- Base Oils: Olive oil, coconut oil, shea butter, and palm oil are popular choices for their moisturizing properties.
- Lye: Also known as sodium hydroxide, lye is essential for the saponification process that turns oils into soap.
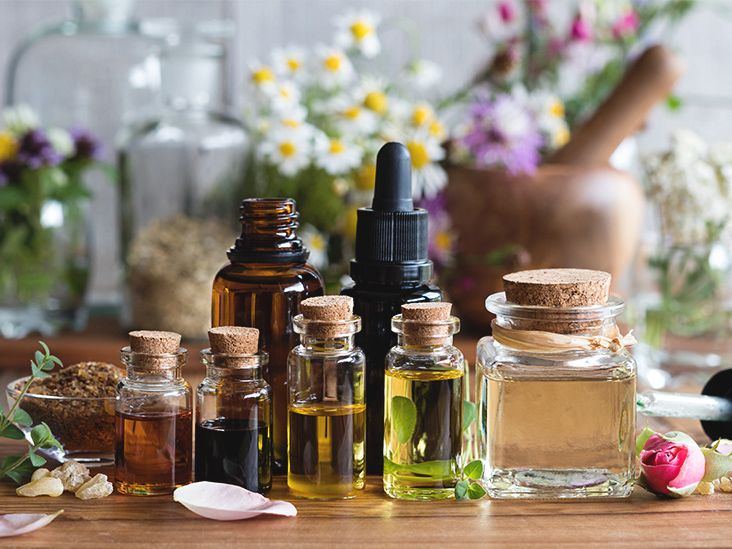
- Herbs and Botanicals: Choose from lavender, chamomile, rosemary, or any other herbs that provide skin benefits.
- Essential Oils: Add natural fragrance with oils like lavender, peppermint, or tea tree.
- Natural Colorants: Use clays, activated charcoal, or turmeric for natural colouring.
- Tools:
- Moulds: Silicone moulds work well for soap making, offering easy release and a variety of shapes.
- Digital Scale: Accurate measurements are crucial for successful soap making.
- Stick Blender: Helps to mix the soap mixture thoroughly and achieve the right consistency.
- Safety Gear: Gloves, goggles, and long sleeves are essential when handling lye.
Understanding the Saponification Process
Saponification is the chemical reaction that occurs when lye mixes with oils, transforming them into soap. Here’s a brief overview:
- Mixing Lye and Water: Carefully mix lye with water, always adding lye to water (never the other way around) to avoid dangerous reactions.
- Blending Oils: Combine your chosen base oils and heat them gently until they reach the correct temperature.
- Combining Lye and Oils: Slowly pour the lye solution into the oils while blending with a stick blender. The mixture will thicken as saponification begins.
- Trace: When the mixture reaches “trace” (a pudding-like consistency), it’s ready for additives like herbs, essential oils, and colourants.
Choosing Herbs and Essential Oils
Herbs and essential oils are the stars of natural soap, offering both fragrance and therapeutic benefits. Here’s how to choose:
- Herbs: Select herbs based on their skin benefits. For example, chamomile is soothing, while rosemary is invigorating.
- Essential Oils: Choose oils that complement your herbs. Lavender pairs well with chamomile for a calming blend, while peppermint and rosemary create an energizing soap.
Step-by-Step Soap Making Process
Here’s how to make your own natural and herbal soap:
Step 1: Prepare Your Workspace: Ensure your area is clean, well-ventilated, and organized.
Step 2: Measure Ingredients: Use a digital scale to measure oils, lye, and water precisely.
Step 3: Mix Lye Solution: Carefully add lye to water and stir until fully dissolved. Set aside to cool.
Step 4: Heat Oils: Melt solid oils (like coconut oil) and combine them with liquid oils.
Step 5: Combine Lye and Oils: Once both the lye solution and oils are at a similar temperature, slowly mix them together.
Step 6: Blend to Trace: Use a stick blender to mix until the soap reaches trace.
Step 7: Add Herbs and Essential Oils: Stir in your chosen herbs and essential oils.
Step 8: Pour into Molds: Pour the mixture into moulds and tap lightly to remove air bubbles.
Step 9: Cure the Soap: Allow the soap to harden in the moulds for 24-48 hours, then unmold and let it cure for 4-6 weeks.
Safety Tips: Always wear protective gear when handling lye and work in a well-ventilated area to avoid inhaling fumes.
Packaging and Presentation Tips
Beautiful packaging can elevate your handmade soap, making it perfect for gifts or sales:
- Eco-Friendly Packaging: Consider using recycled paper, burlap, or cloth wraps to package your soaps.
- Labelling: Clearly label each soap with its ingredients, especially if selling, to inform customers about potential allergens.
- Presentation: Add a personal touch with hand-tied tags, stamps, or eco-friendly twine.

Where to Buy Candle-Making Supplies
For high-quality natural and herbal soap-making supplies, visit PriyaRawSupplies.in. They offer a wide range of ingredients, including essential oils, herbs, and moulds, perfect for your soap-making needs. Check out their special offers and discounts to get started on your soap-making journey.
Conclusion
Handmade natural and herbal soap is not just a product; it’s a labour of love that reflects your creativity and commitment to natural living. Whether for personal use or as part of a small business, the process of soap-making is both rewarding and therapeutic. With the right ingredients and tools from PriyaRawSupplies.in, you’re well on your way to creating soaps that nourish the skin and soothe the soul. Start your soap-making adventure today!